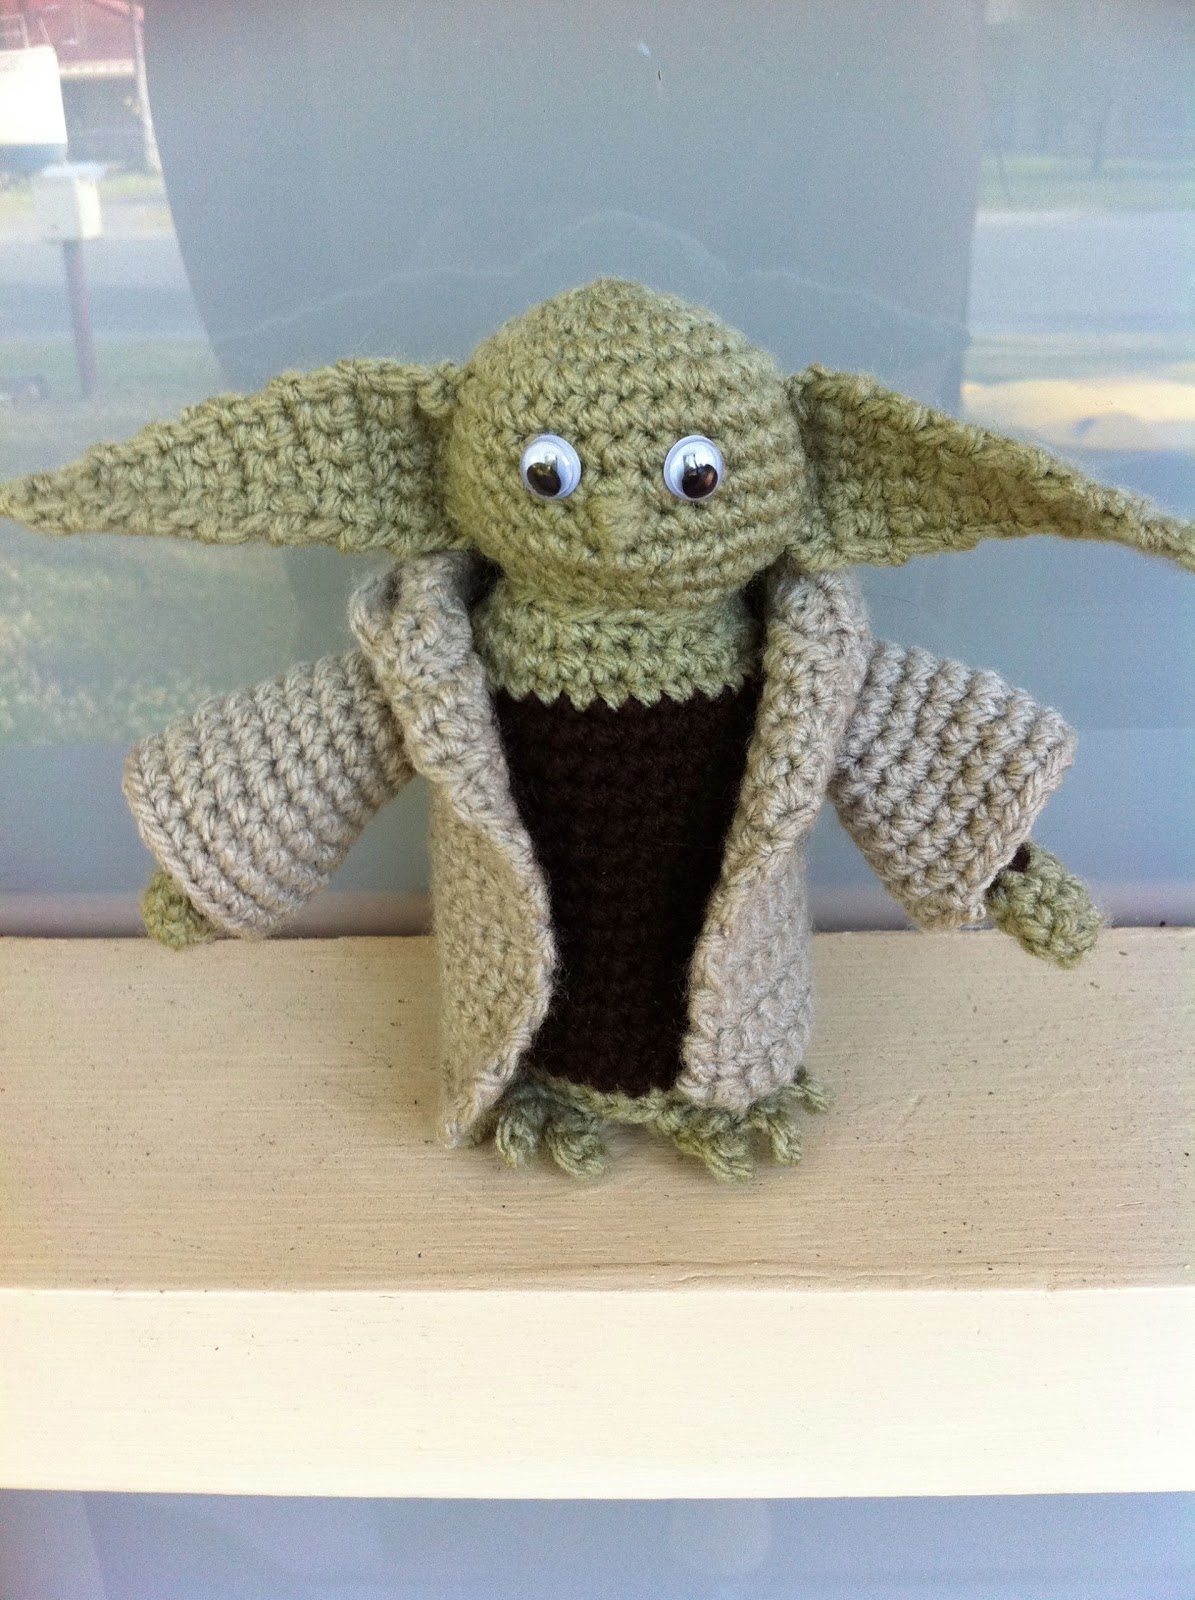
I had seen another Yoda pattern out there, but I'm known for my attention to detail so decided to come up with my own.
Equipment:
Yarn: Moss/sage green, chocolate brown and fawn/beige. I used Moda Vera Marvel 8 ply.
Hook: I used a 3mm.
Extras: Yarn needle for weaving in ends, attaching eyes and adding face features; 2 goggle eyes; polyfill or your preferred stuff; dry popcorn/rice/other weighted stuffing
Abbreviations:
CH = Chain
SC = Single Crochet
HDC = Half Double Crochet
SC2tog = Single crochet 2 stitches together
HDC2tog = Half double crochet 2 stitches together
Pattern:
Head
Rnd 1: In green 6 SC in a magic circle
Rnd 2: 2 SC in each SC (12)
Rnd 3: *SC in first stitch, 2 SC in next stitch. Repeat from * around (18)
Rnd 4: *SC in first 2 stitches, 2 SC in next stitch. Repeat from * around (24)
Rnd 5: *SC in first 3 stitches, 2 SC in next stitch. Repeat from * around (30)
Rnd 6 - 10: SC all stitches around
Rnd 11: *SC in first 3 stitches, SC2tog. Repeat from * around (24)
Rnd 12: *SC in first 2 stitches, SC2tog. Repeat from * around (18)
Rnd 13: *SC in first stitch, SC2tog. Repeat from * around (12)
Start stuffing and shaping the head before the opening gets too small
Rnd 14: SC2tog around (6)
FO leaving a tail.
Finish stuffing. Using yarn needle, weave tail through stitches and pull to close opening.
Ears - Make 2
To save me writing it on each line, at the end of each row chain one and turn
Row 1: In green, chain 7. SC in 2nd chain from stitch. SC across row
Row 2: SC across row
Row 3: SC in first two stitches, SC2tog, SC last two stitches (5)
Rows 4 - 6: SC across row
Row 7: SC in first two stitches, SC2tog, SC last stitch (4)
Rows 8 - 11: SC across row
Row 12: SC in first stitch, SC2tog, SC last stitch (3)
Rows 13 - 15: SC across row
Row 16: SC first stitch, SC2tog (2)
Rows 17 - 18: SC across row
Row 19: SC2tog
FO and weave in end
Body:
The body will be worked from the base up.
Rnd 1: In green 6 SC in a magic circle
Rnd 2: 2 SC in each SC (12)
Rnd 3: *SC in first stitch, 2 SC in next stitch. Repeat from * around (18)
Rnd 4: *SC in first 2 stitches, 2 SC in next stitch. Repeat from * around (24)
Rnd 5: *SC in first 3 stitches, 2 SC in next stitch. Repeat from * around (30)
Rnd 6: SC around in back loops only
Rnd 7: Change to brown, SC around
Rnds 8 - 20: SC around
As I worked this in spirals, the last stitch of brown (20th round) did not line up with the first brown stitch so I added 4 more brown stitches before changing to green.Rnd 21: *SC in first 3 stitches, SC2tog. Repeat from * around (24)
Rnd 22: *SC in first 2 stitches, SC2tog. Repeat from * around (18)
Rnd 23: *SC in first stitch, SC2tog. Repeat from * around (12)
FO and leave a long tail for attaching the head
Fill the body about a quarter to a third of the way up with the popcorn/rice/weighted stuffing. This will help Yoda stand up. Fill the remaining space with polyfill/stuffing of choice.
Arms - Make 2:
Rnd 1: In green 6 SC in a magic circle
Rnds 2 - 3: SC around
Rnd 4: SC in first 3 stitches, CH 2, SC in second chain from hook and SC in stitch at base of chain, SC in last 3 stitches
Rnd 5: SC around, going behind the 'thumb' that was just made
Rnd 6: change to brown and SC around
Rnds 7 - 15: SC around.
Add or remove brown rows so that the arm reaches from the top of the brown part of the body to the base of the body.
FO and leave a tail for attaching to the body. Stuff lightly with a little polyfill.
Feet - Make 2:
Rnd 1: In green 6 SC in a magic circle
Rnd 2: 2 SC in each SC (12)
1st toe: SC in first stitch, CH 3, SC in 2nd CH from hook and next CH, sl st in base SC
2nd toe: SC in next stitch, CH 4, SC in 2nd CH from hook and next 2 CH, sl st in base SC
3rd toe: repeat as for first toe
FO and weave in ends
Assembly:

Attach feet to the base of the body so that the toes just stick out past the body.
Attach the arms so the tops line up with the top of the brown section of Yoda's body.
Using green thread, start by sewing a his nose so it sits just below the top of his ears. Just below the nose, sew across to make a mouth. Then, line up the eyes so they sit just above and close to either side of the nose. I found it helpful to refer to a picture of Yoda (just do a Google Image search) to get the proportions right. I used 8mm eyes, but i think it would have worked better if they were a little smaller.

Coat:
I have recently discovered the chainless foundation row and I love it! For a great video on how to do it, check out my FAQ page (tab up the top)
To save me writing it on each line, at the end of each row chain one and turn
 Row 1: I used 34 stitches - it was enough to almost go all the way around Yoda
Rows 2 - 14: SC across
Add or remove rows as necessary so that fabric reaches Yoda's 'armpits'
Row 15: SC 6 stitches, CH 4 and skip next 4 SC, SC in next stitch, SC until last 10 stitches, CH 4 and skip next 4 SC, SC remaining 6 stitches
Row 16: SC across, SC 4 times in each 4 CH space
Rows 17 - 19: 2HDCtog twice, HDC across until last 4, 2HDCtog twice
Rows 20 - 28: HDC across
 Row 29: Hold the fabric so the two ends line up. SC one stitch from each side together. Work until all stitches are joined.
FO and weave in end
Sleeves - make one on each side:
Rnd 1: SC 10 stitches around the hole created in the coat (one in each SC and one in each 'corner')
Rnd 2: *SC in first stitch, 2 SC in next stitch. Repeat from * around (15)
Rnds 3 - 4: SC around
Rnd 5: *SC in first 2 stitches, 2 SC in next stitch. Repeat from * around (20)
Rnd 6 - 8: SC around
Rnd 9: SC 10 stitches, Sl St next stitch
FO and weave in ends
Gently feed Yoda's arms through the sleeves on the coat and he is done!

Yoda and any Star Wars related items found on this blog remain the property of Lucasfilm Ltd
Awesome! Thanks so much for sharing the pattern.
ReplyDeleteSuper great!!! Thank you, my son just saw it, and he wants me to make it for him, thanks for sharing the pattern!!!
ReplyDeleteThank you so much for sharing this cute guy - it is gorgeous! We are great fans of StarWars and I like crocheting - so I will start soon!
ReplyDeleteBye
Claudia
Wow!! He's great! I'll do a Yoda too.... <3
ReplyDeleteFabulous, thank you so much for sharing, I have a few recipients in mind for this gift of awesomeness. Make him I shall!
ReplyDeleteHow much yarn of each color do you need, and how large is the finished project? Thanks!
ReplyDeleteI love the attention to detail that went into this Yoda crochet pattern.
ReplyDelete